[http://jnaudin.free.fr/2SGen/indexen.htm]  2SGen, an amazing tiny Solid State Generator by JL Naudin created on february 15, 2009 - JLN Labs - Last update march 10, 2010Toutes les informations et schémas sont publiés gratuitement ( freeware ) et sont destinés à un usage personnel et non commercial All informations and diagrams are published freely (freeware) and are intended for a private use and a non commercial use.
 The toroidal coil uses a ferromagnetic core (grade 3E25) specific inductance Al=3820 (23x14x7 mm) (µ=6000), Rdc:1.4 ohms, and it is wound CW with 7.5 m of 4/10 mm copper wire, The magnet is a 10 mm diameter and 5 mm thick neodymium magnet, The output coil is a air core flat coil (OD: 42, ID:18mm, TH: 8mm) inductance=636 mH, Rdc=990 ohms made with 450m of 0.1 mm diam copper wire.  The neodymium magnet is simply sticked magnetically on one side of the toroid... Below the diagram of the 2SGen v1.0   Whether the 2SGen powers the High Power Leds lamp or not, the measured current through the toroïdal stator coil remains the same... Whether the 2SGen powers the High Power Leds lamp or not, the measured current through the toroïdal stator coil remains the same...Below, you will find the full video of the 2SGen v1.0 in action:  The neodymium magnet is important. Without the magnet, the lamp does not light up, there is no current in the pickup coil because there is no EM coupling with the toroïdal coil
Below, you will find a new video of the 2SGen test with and without the magnet:  Above, the full diagram of the S2Gen v2, no external pulse generator is needed. The best tuning is set for f = 200 Hz (Dtc=27%) 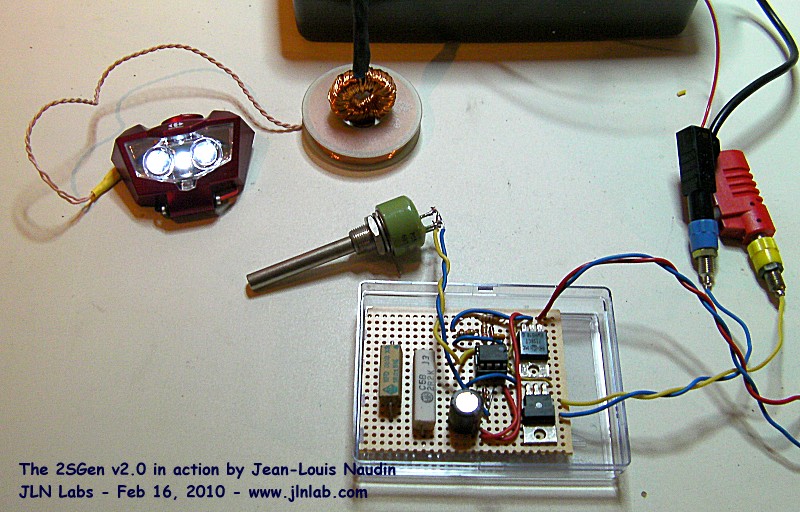       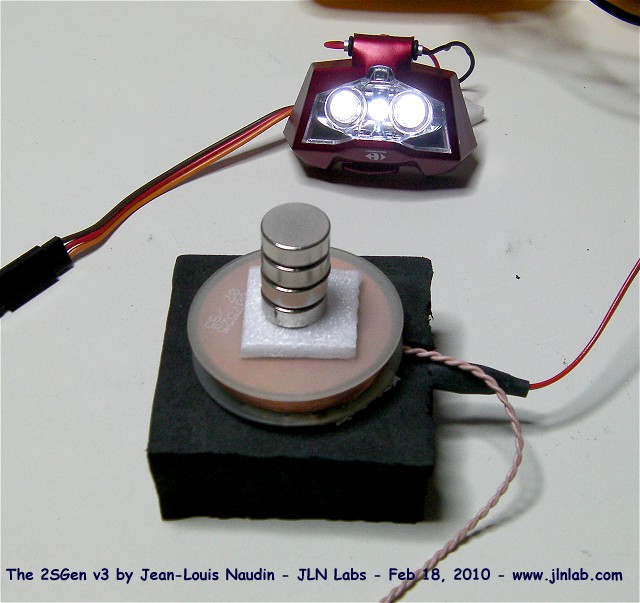    With the Nanoperm core, when the magnet is placed on the top of the 2SGen, the drop of the DC current at the input is greater than with the ferrite core... Woow... With the Nanoperm core, when the magnet is placed on the top of the 2SGen, the drop of the DC current at the input is greater than with the ferrite core... Woow...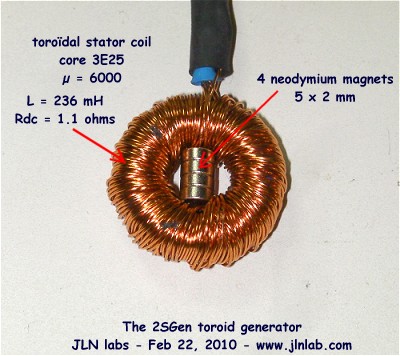 Above the new 2SGen setup: the neodymium magnets have been placed in the center of the toroïd Above the new 2SGen setup: the neodymium magnets have been placed in the center of the toroïdso has the magnetic lines are closed inside the toroïdal core.  With this new setup, there is more OUTPUT power without change at the input.  The toroïdal 2SGen coil has also been fully inserted in a cylindrical air coil. WOOW... The POWER OUT is greatly magnified without any change in at the input of the DC power supply... 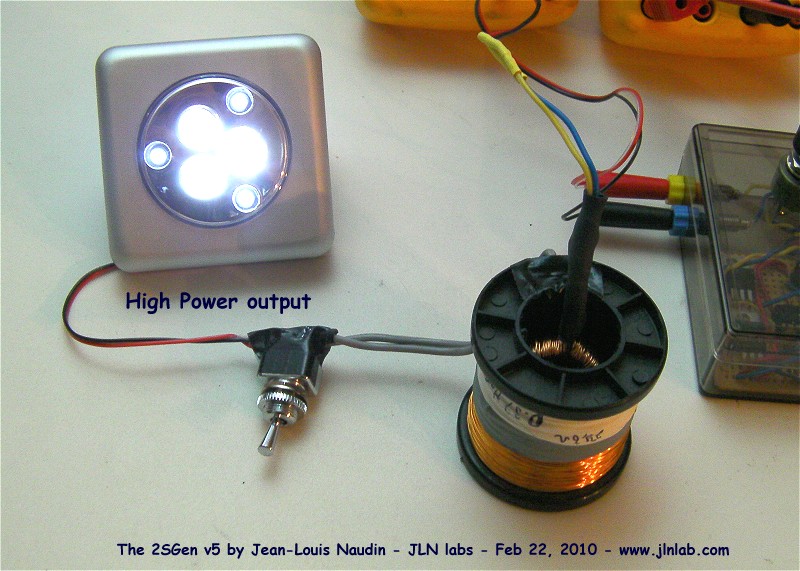 Now, with the 2SGen V5, I am able to power higher power leds panels...  See, below, the full video of the tests of the 2SGen v4 and v5 : 2SGen Episode 6: The 2SGen hidden principle: The energy from the core magnetization/demagnetization process In the scope pictures below:
 Look at the blue curve, the first part (negative curve) is the magnetization phase of the core (building up of the magnetic energy), you may notice some Barkhausen effect bumps. The second part (positive curve) is the demagnetization phase of the core. The excess free energy is tapped during the demagnetization process and not during the magnetization process due to the blocking diode connected at the output coil. To get more free energy from the 2SGen device, the clock pulse must be shorter as possible (during the magnetization process). The process of free energy generation from magnetization/demagnetization of a ferromagnetic core has been fully explained in the Nikolay E. Zaev paper "Ferrites and Ferromagnetics Free Energy Generation" published in New Energy Technologies Issue #5 Sept-Oct 2002.  The pulse period must be greater than the time of the magnetization/demagnetization process, here 1500 µs. The pulse period must be greater than the time of the magnetization/demagnetization process, here 1500 µs.Some important keys to get an excess of energy:
S2Gen Episode 7: Measuring the ratio between the Demagnetization energy and the Magnetization energy You will find below a 2SGen v5 simulation with FEMM with a Nanoperm M-059 core with the same setup used in the real working prototype.    See, below, the video of the tests of the 2SGen v6 which power the two light bulbs:  Above, the testing setup used to measure the hysteresis curve of the 2SGen core  Above, the hysteresis curves of the toroïdal core at 200 Hz sine wave. You may notice that the hysteresis curve begins nearly flat when the magnet is close to the toroïdal core. In this case the permeabilty of the core begins very weak.  Above, the hysteresis curves of the toroïdal Nanoperm M-074 core at 200 Hz sine wave.  Above, the hysteresis curves of the toroïdal core at 3300 Hz DC pulsed squared wave (DTC ON 40%) Below, you will find a video of the hysteresis tests with the 2SGen v6 Stay tuned, more to come soon...  Technical datasheets :
return to the Electromagnetic devices home page |


Mosfet self resonating circuit
No comments:
Post a Comment